Production Wiki
Exporting from KiCAD
Setting Coordinate Origin Point
Before exporting manufacturing data, ensure you have set a correct zero reference point. Typically, the lower-left corner is used, though the upper-left corner is occasionally chosen.
To set the zero reference point in KiCAD, select the tool Place origin point from drill files and component placement files in the right sidebar.
- Note: This tool is often hidden behind the tool Place the grid origin point.
Exporting Gerber Files
To export Gerber files in KiCAD, follow these steps:
- Open the project you want to export in KiCAD.
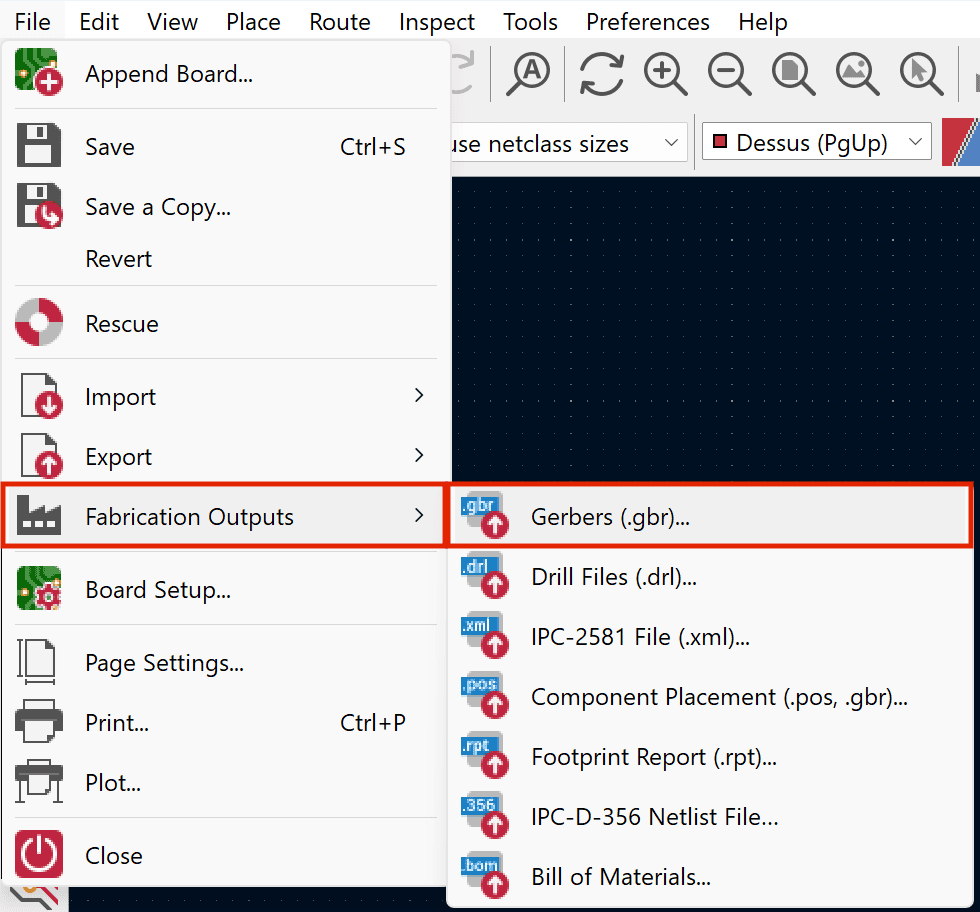
- Click on File > Fabrication Outputs > Gerbers (.gbr).
- In the "Plot" window, select all layers you want to export.
- (Optional) Select Generate Gerber job file to minimize the information required later in our software.
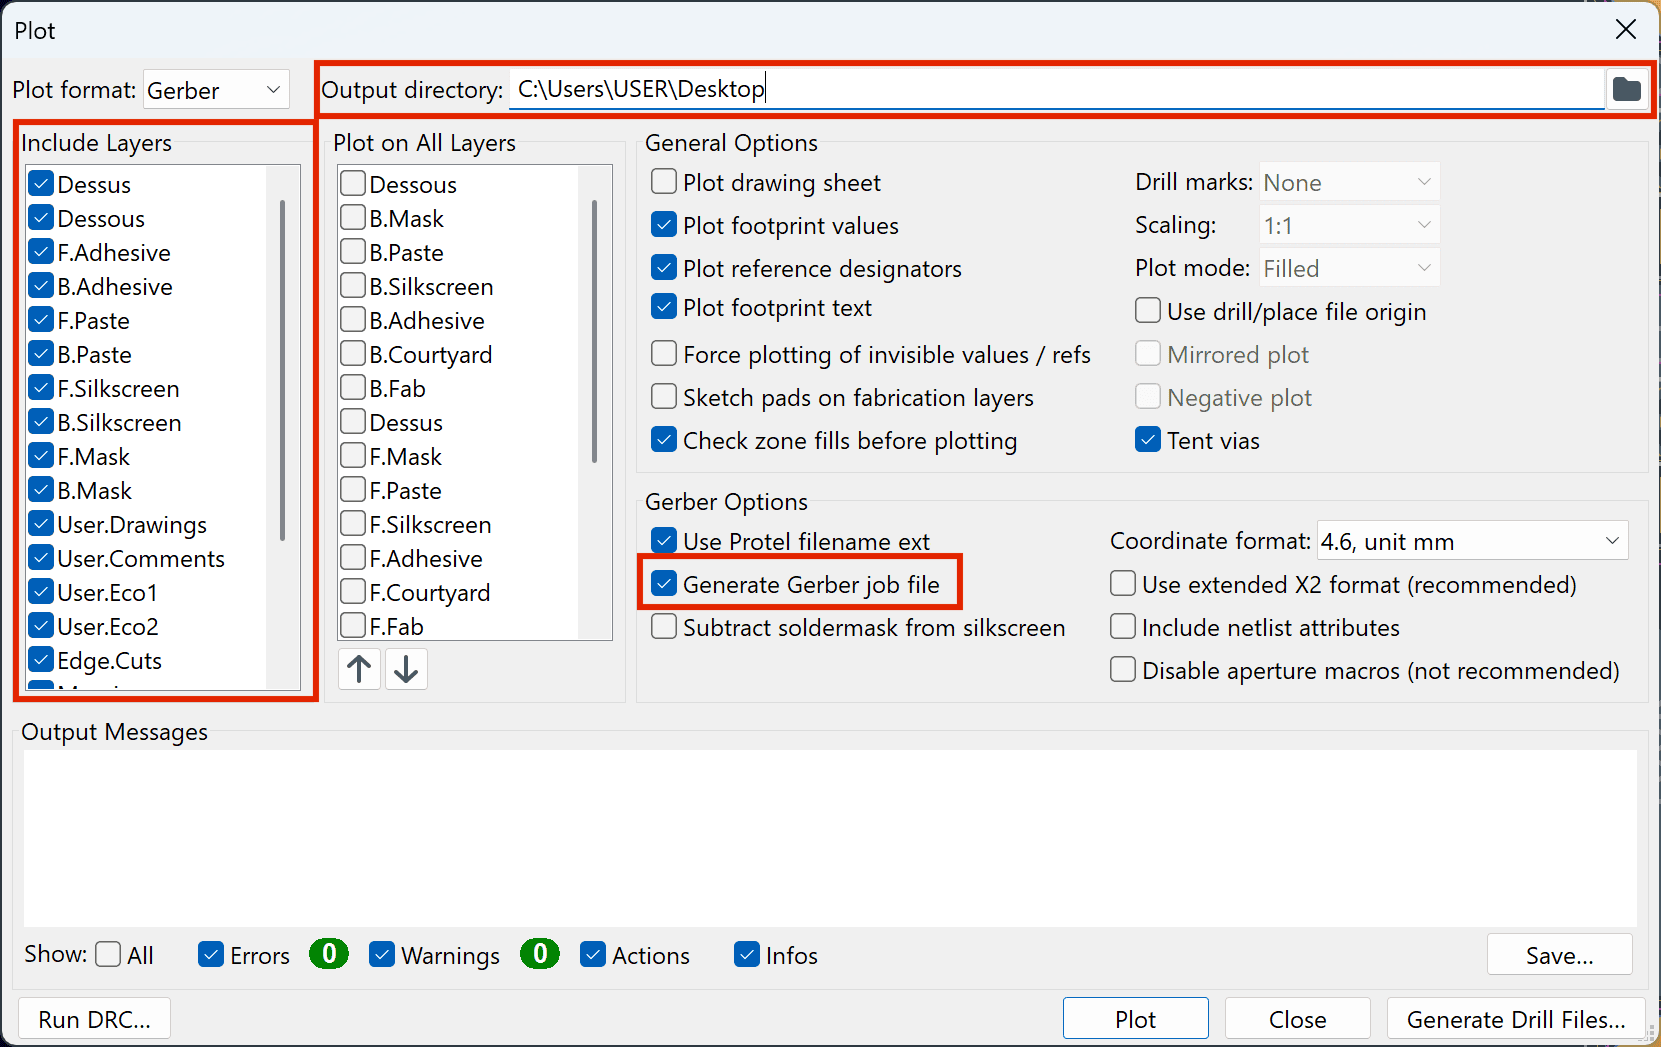
- Choose the output directory and click Plot.
Exporting Bill of Materials (BOM)
To export a Bill of Materials (BOM) in KiCAD, follow these steps:
- Open the project you want to export in KiCAD.
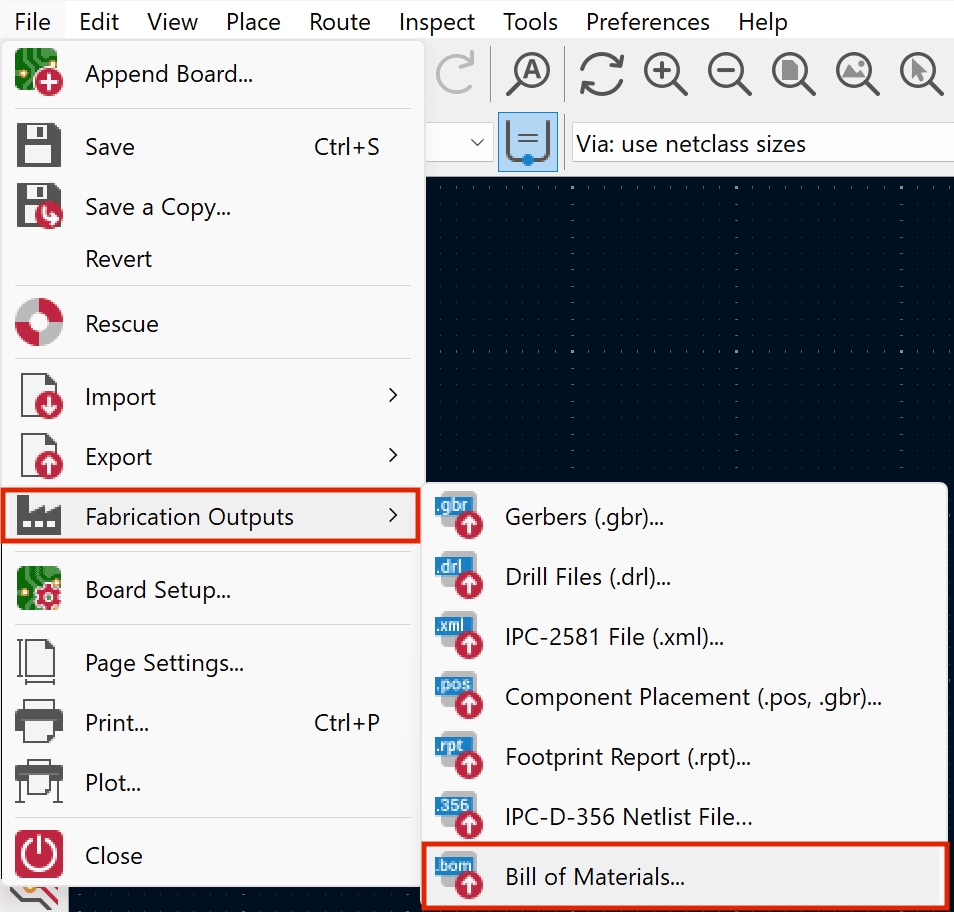
- Click on File > Fabrication Outputs > Bill of Materials (BoM).
- Select a file location and file name for the BOM and click Save.
Exporting Component Positioning (CPL)
To export a Component Placement List (CPL) in KiCAD, follow these steps:
- Open the project you want to export in KiCAD.
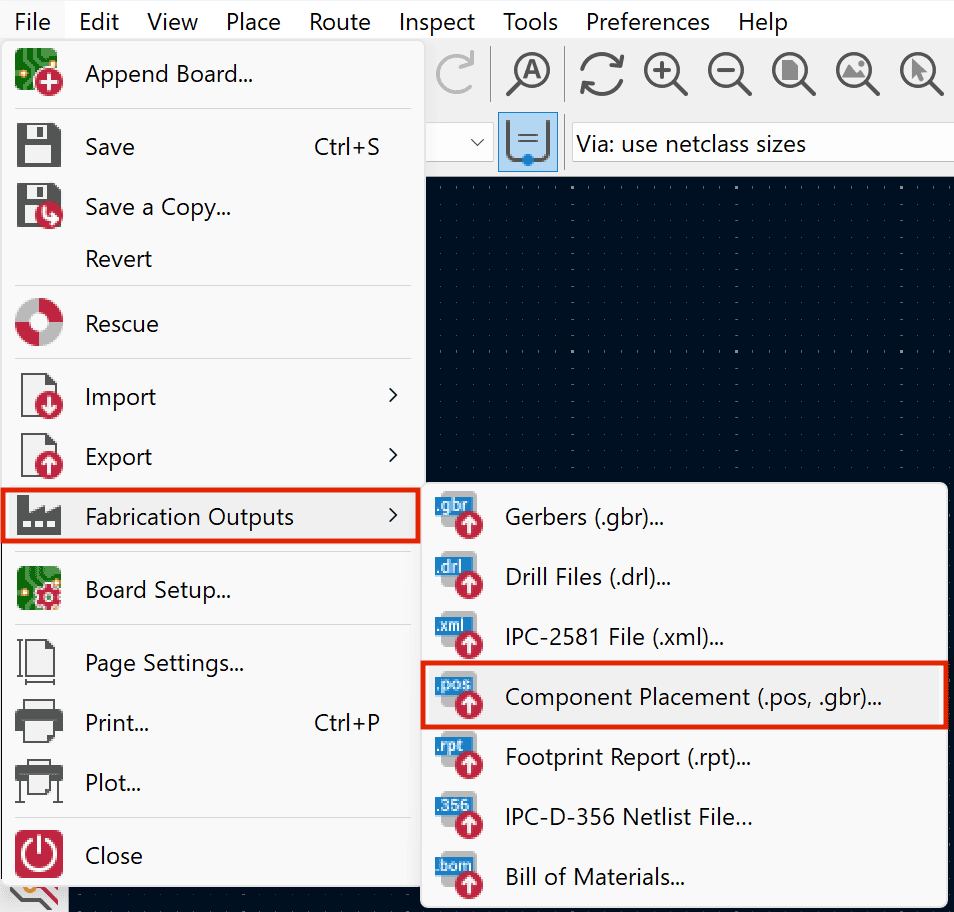
- Click on File > Fabrication Outputs > Component Placement (.pos, .gbr).
- Select CSV as the format.
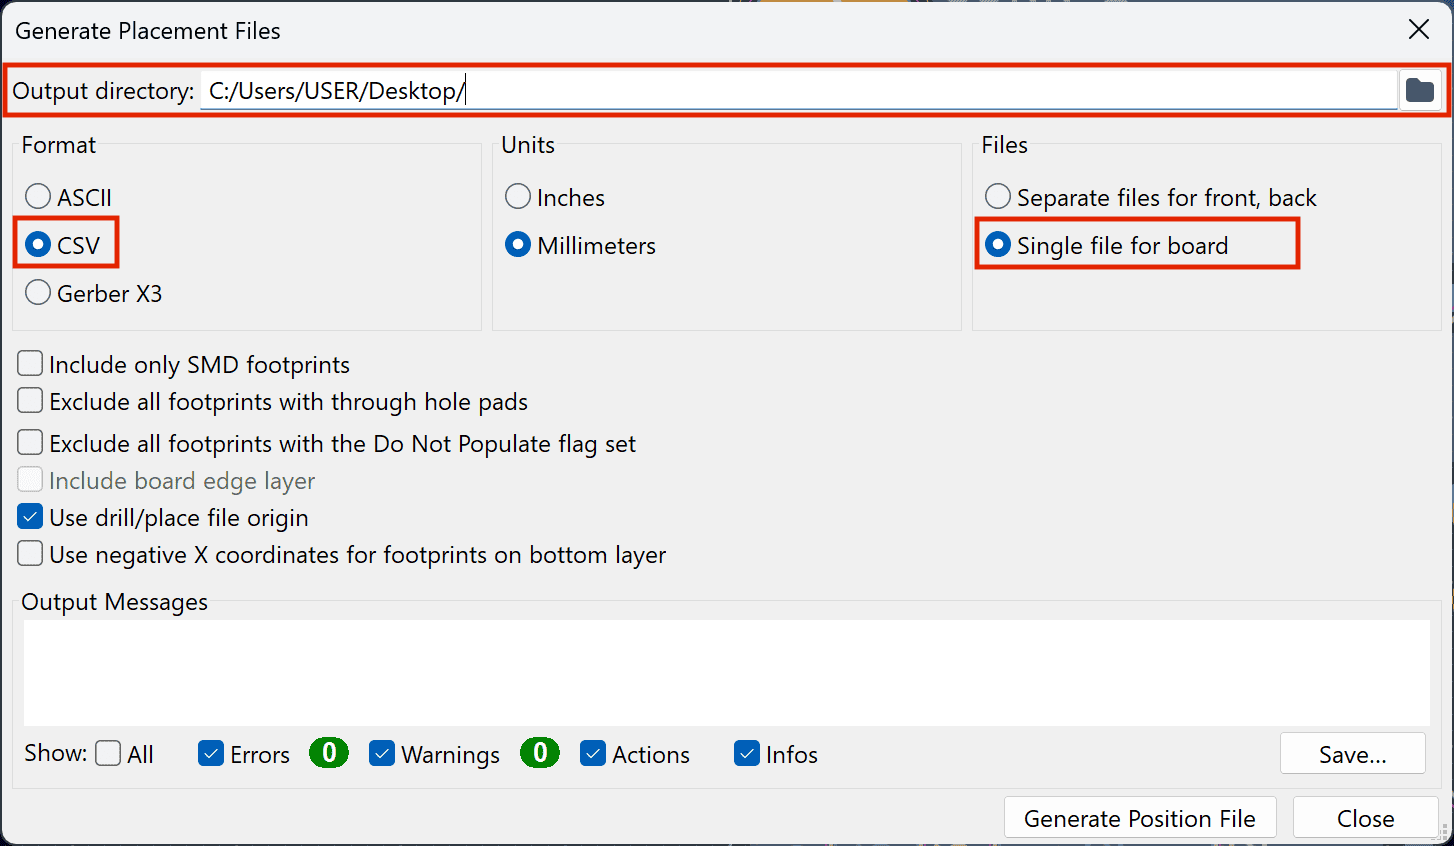
- Choose Single file for board under the Files section.
- Select an output directory and click Generate Position File.
Exporting Drill Holes
To export drill hole data in KiCAD, follow these steps:
- Open the project you want to export in KiCAD.
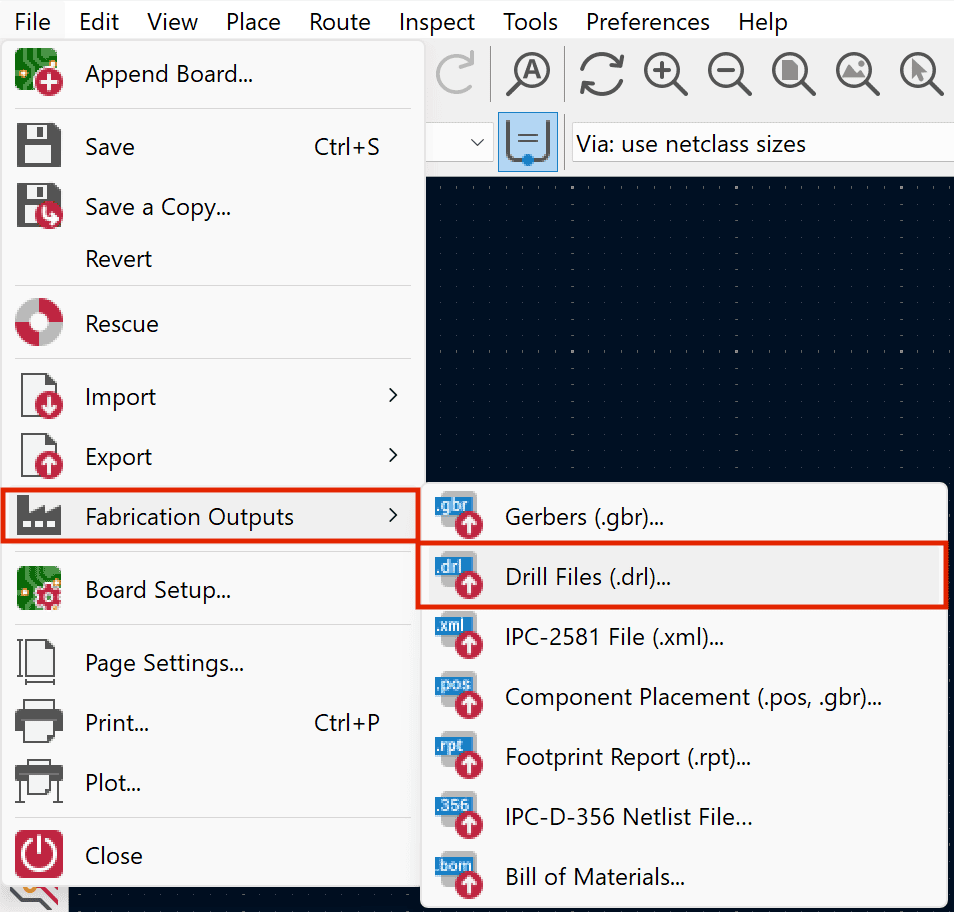
- Click on File > Fabrication Outputs > Drill Files (.drl).
- Select Drill/place file origin as the Drill Origin.
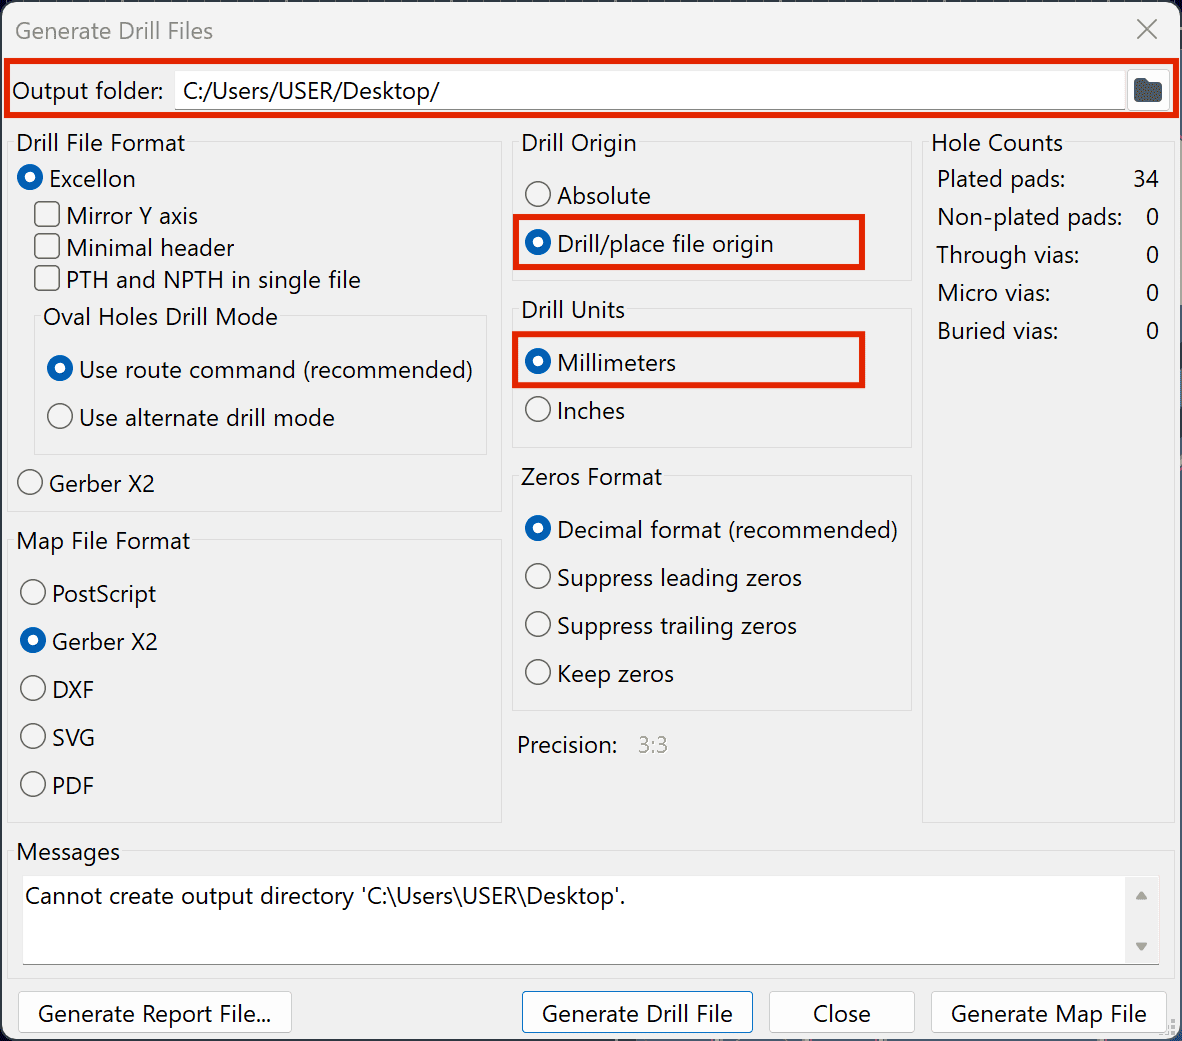
- Choose Millimeters as the Drill Units.
- Select an output directory and click Generate Drill File.