Production Wiki
Exporting from Altium
Setting Coordinate Origin Point
Before exporting the various manufacturing data, make sure that you have set a correct zero reference point. Usually the lower left corner is used, rarely the upper left.
To set the zero reference point in Altium, click on “Edit” -> “Origin” -> “Set” in the menu bar.
Exporting Gerber
To export Gerber files from Altium, follow these steps:
- Select the PCB design (.PcbDoc) you want to export in the Altium project data sidebar.
- Click on “File” -> “Fabrication Outputs”.
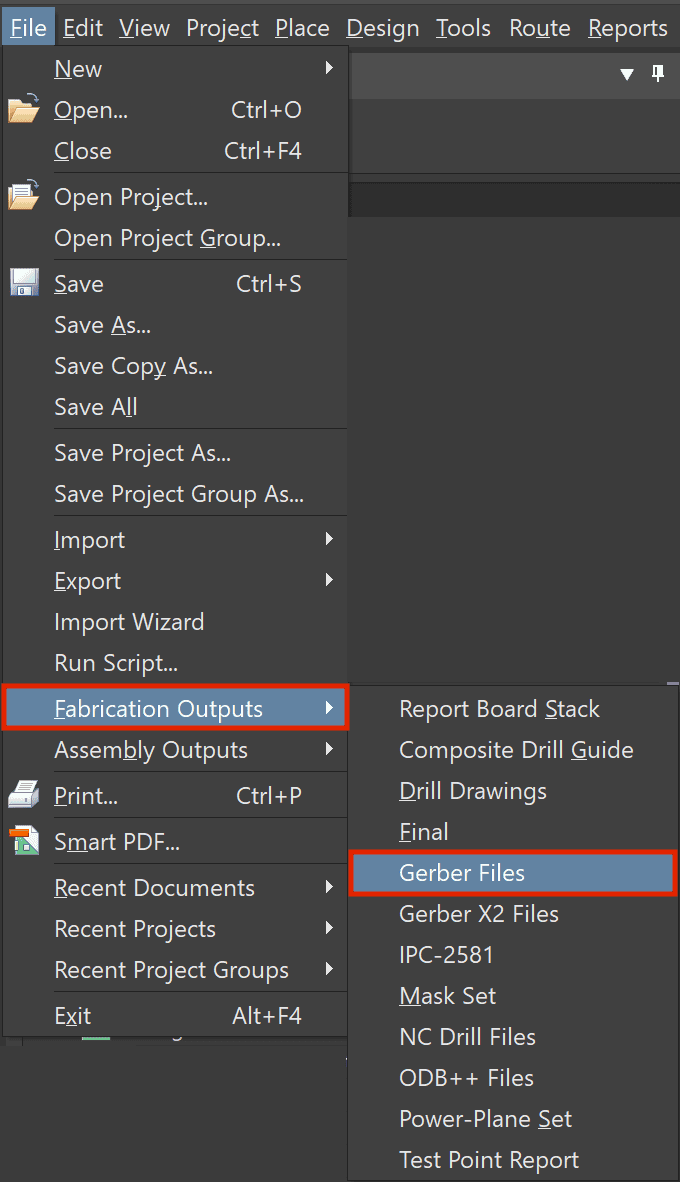
- Click on “Apply” and the Gerber data will appear in the Altium project data sidebar under “Generated” -> “CAMtastic! Documents” or in the file explorer of your operating system under “Project Outputs for...”.
Exporting Parts list (BOM)
To export the parts list (BOM) from Altium, follow these steps:
- Open the project for which you want to export the BOM in the Altium project data overview.
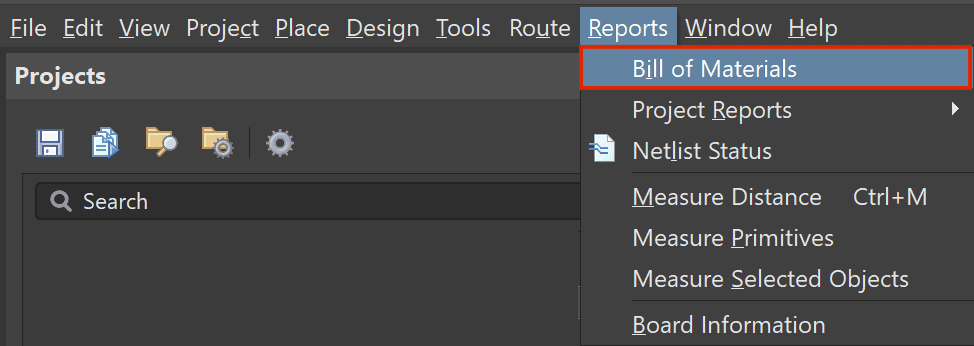
- Click on “Reports” -> “Bill of Materials” in the menu bar.
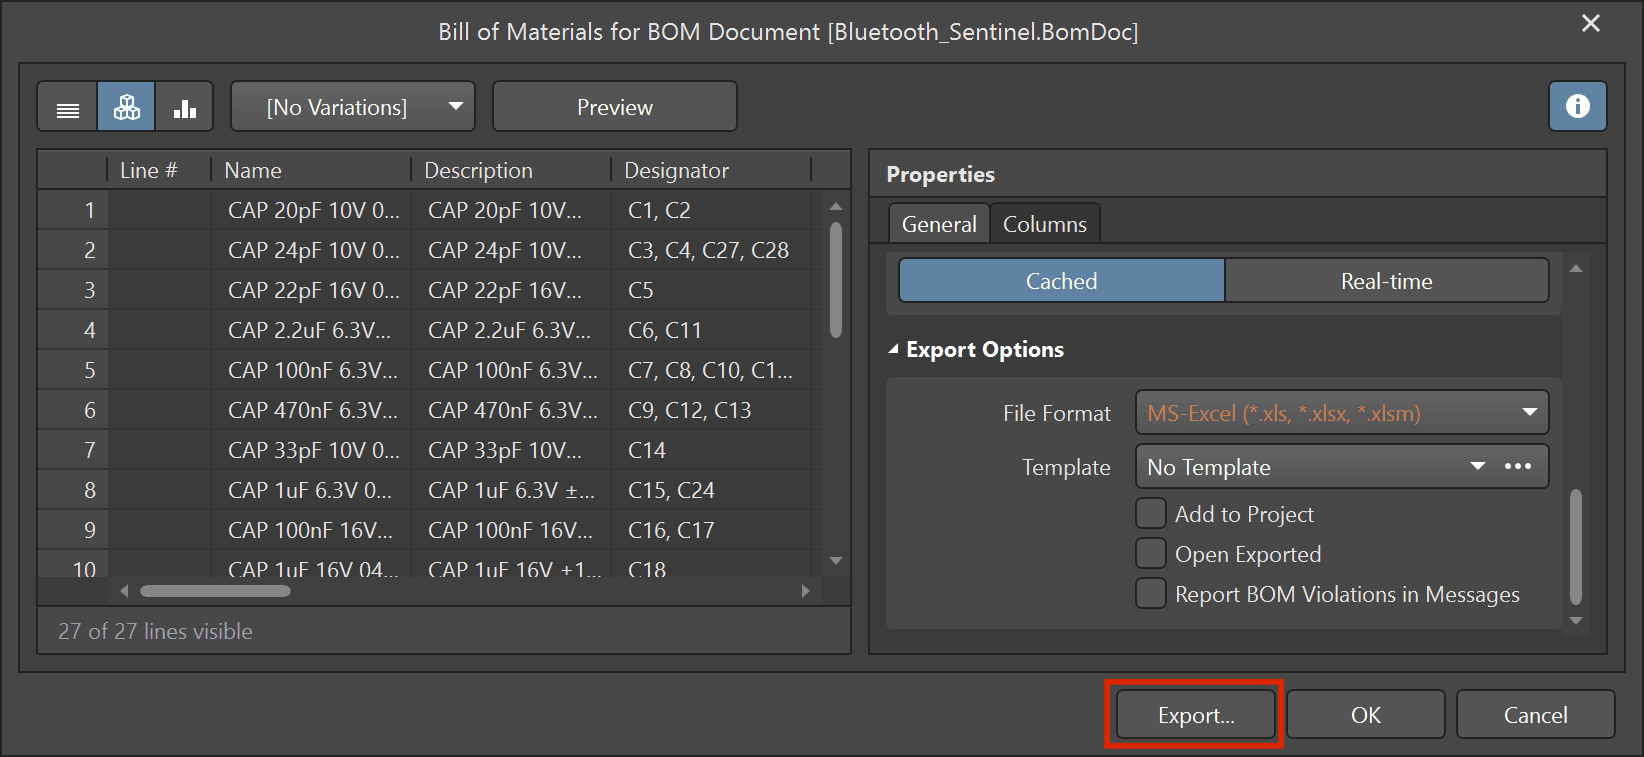
- Keep the file format set to “MS-Excel”
- Click on ‘Export…’ and select the desired output directory and a file name.
Exporting Component Placement (CPL)
To export Component Placement (CPL) in Altium, follow these steps:
- Select the PCB design (.PcbDoc) for which you want to export the CPL in the Altium project data sidebar.
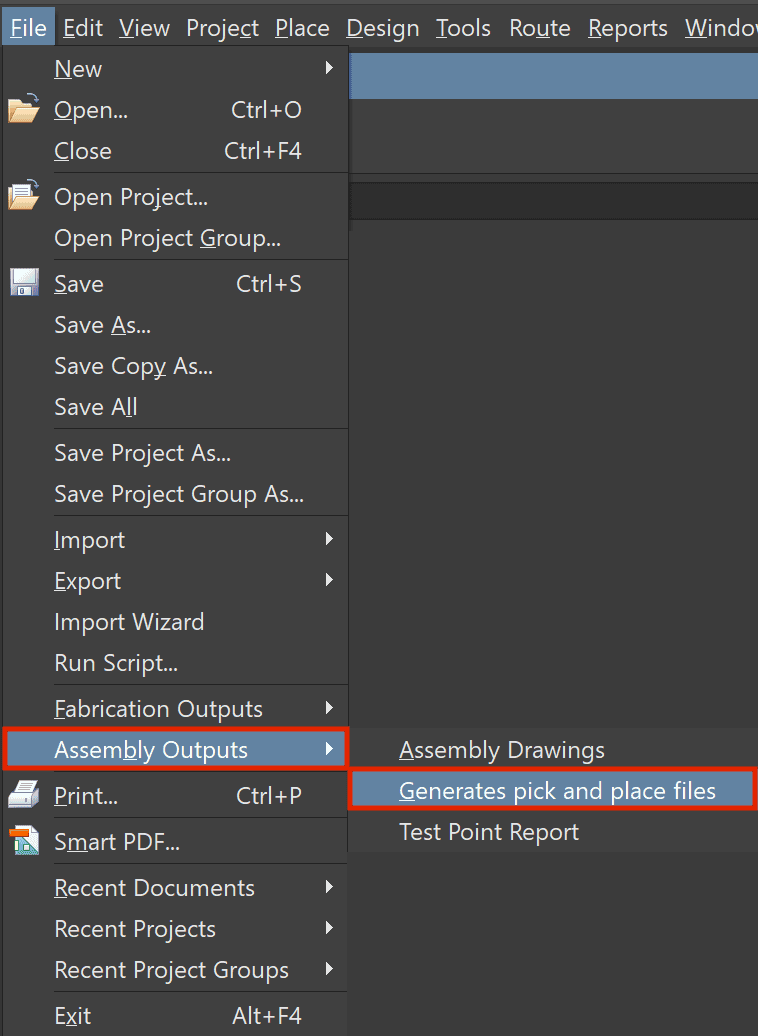
- Click on “File” -> “Assembly Outputs” -> “Generate pick and place files” in the menu bar.
- Select “Metric” as the unit under Output Settings.
- Select “CSV” as the format under Output Settings.
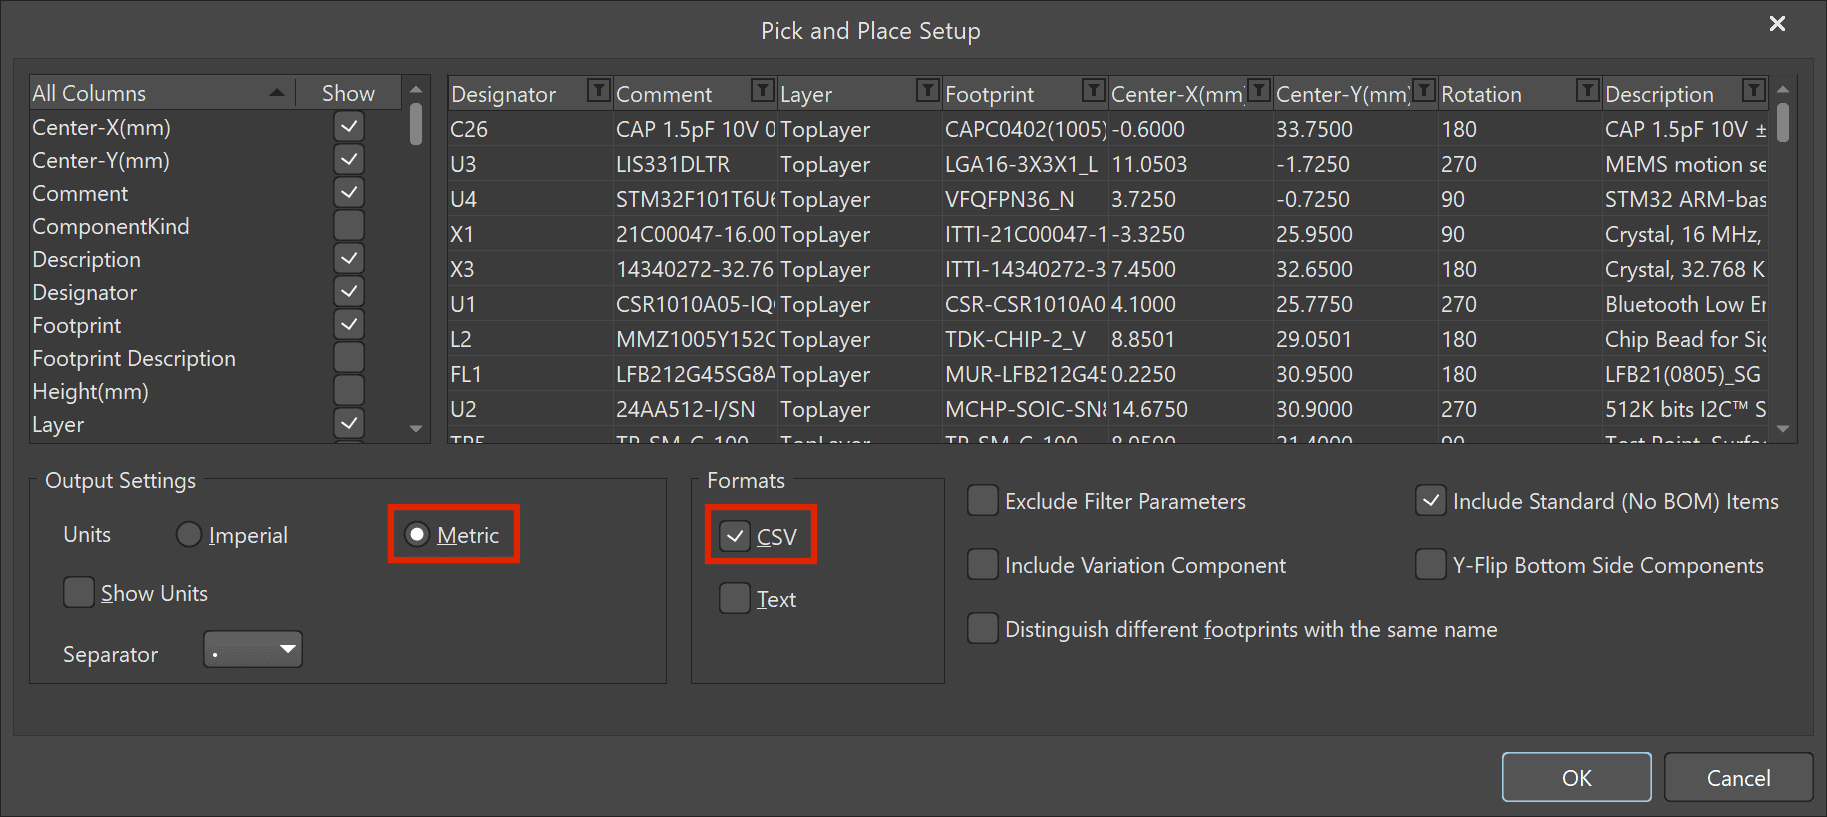
- Click “OK” and the CPL data will appear in the Altium Project Data Overview under “Generated” -> “Text Documents” or in the file explorer of your operating system under “Project Outputs for...”.